-
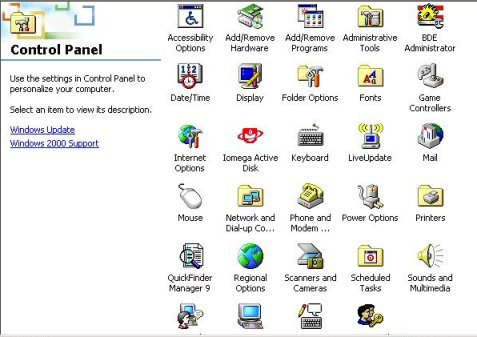
First open the Control
Panel dialog box by clicking on the Start button, moving the
mouse to Settings and click on Control Panel.
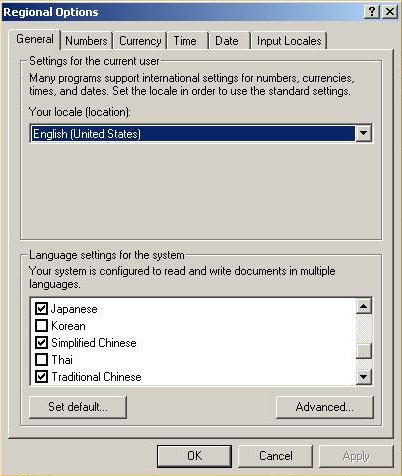
Then double click on Regional Options to open
its dialog box.
- Under the
General tab in the Regional Options dialog box, check
the languages you want supported (Japanese; Korean; Simplified Chinese;
and/or Traditional Chinese) by clicking in the checkbox next to those
languages listed under Language settings for the system. You
may need to scroll down to see the language options you want. You may be
prompted for a Windows 2000 Professional CD-ROM.
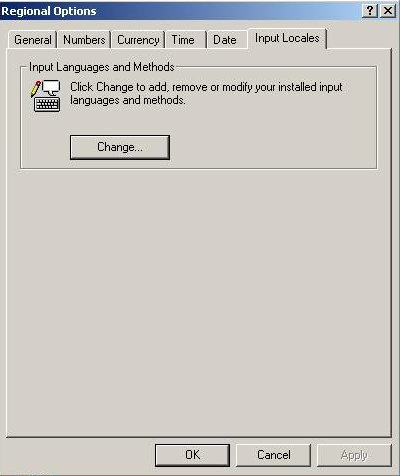
- Next, click on the tab for
Input Locales, and then add the language input options you want
by clicking on the Change... button under Input Languages
and Methods.
- If you have used
certain input methods before, you will probably want to choose those if
they are available in Microsoft's menus. For Japanese the only choice
besides Japanese keyboard is MS-IME 2000 (IME stands for Input Method
Editor). For traditional and simplified Chinese, there are many choices.
If you are comfortable with the Pinyin romanization system for Chinese,
you may want to choose Chinese (Simplified) - MS-Pinyin98. Note that
MS-Pinyin98 allows toggling between traditional and simplified Chinese
input, and so if you want to be able to write both traditional and
simplified characters you may not need to install a traditional Chinese
input option in addition.
The next 3 sections illustrate the
installation of this input editor. For installing Japanese MS-IME 2000
(which in its default setting allows the writing of kana and kanji by
Romaji input), skip to section
(8). I have not provided examples here for installing Korean and
Traditional Chinese language input, but the steps should be similar to
those for installing Japanese and Simplified Chinese.
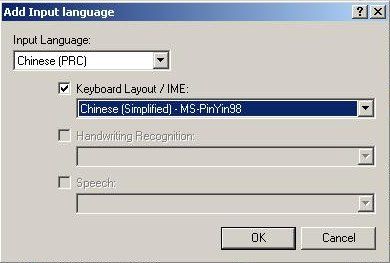
- After you have
clicked the Change button in the Input Locales tab as
outlined in section (3), you get the Add Input Language dialogue box. Choose
Chinese (PRC) from the drop-down list under Input
Language, check the Keyboard Layout / IME button, and then
pick Chinese (Simplified) - MS-PinYin 98. Then click
OK.
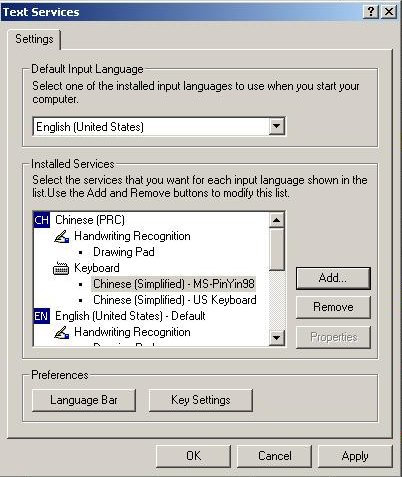
- You are now back
to the Text Services dialog box. Note that Under Chinese
(PRC) /Keyboard, Chinese (Simplified) - MS-PinYin
98 is now listed. Click Apply and then
OK.
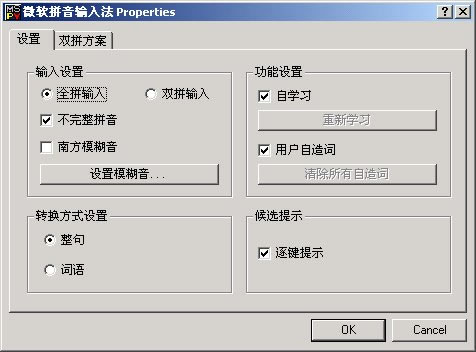
- After you have
installed Chinese (Simplified) - MS-Pinyin98 input editor, you may want
to fine tune its properties. To do this, first select Chinese
(Simplified) - MS-Pinyin98 under Services in the Text
Services dialog box by clicking on and highlighting it. Then click
on Properties to bring up the Properties dialog box
for MS-Pinyin98.
For new users, it is strongly recommended that  be
checked (if it is not checked by default) and that the other default
options be left in place. A prompt line interface will then be available
to allow easy choice of the correct Chinese character(s) for the pinyin
romanization just entered. (An explanation of how this prompt line
interface works is found on the page for writing
Chinese under Windows 2000 Professional.) Experienced users will
want to pick and choose their options. be
checked (if it is not checked by default) and that the other default
options be left in place. A prompt line interface will then be available
to allow easy choice of the correct Chinese character(s) for the pinyin
romanization just entered. (An explanation of how this prompt line
interface works is found on the page for writing
Chinese under Windows 2000 Professional.) Experienced users will
want to pick and choose their options.
- This and the next 2 sections explain how to install
Japanese MS-IME 2000. Start by clicking on on the Change button
under Input Languages and Methods while you are in the
Input Locales tab of the Regional Options dialog box,
as in section (3). Then you get the Add Input Language dialogue box.
Choose Japanese from the drop-down list under Input
Language, check the Keyboard Layout / IME button,
and then pick Japanese Input System (MS-IME 2000). Then click
OK.

- You are now back
to the Text Services dialog box. Note that under
Japanese / Keyboard, Japanese Input System (MS-IME
2000) is now listed. Click Apply and then
OK.

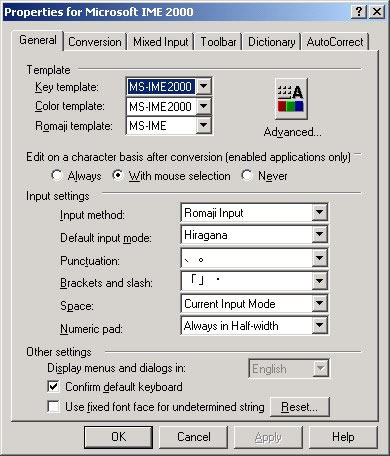
- After you have
installed Japanese MS-IME 2000, you may want to fine tune its
properties. To do this, first select Japanese Input System (MS-IME
2000) under Services in the Text Services dialog
box by clicking on and highlighting it. Then click on
Properties to bring up the Properties dialog box for
MS-IME 2000. Experienced users will want to pick and choose their
options. For new users, it is strongly recommended that the default
options be left in place.
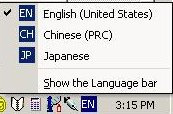
- Voilà! You are
now ready to both read and write Chinese and/or Japanese in your
documents. You will see on the right hand side of the taskbar at the
bottom of the Windows desktop the Language bar button
 , which allows
users to change the input language in an application by left
clicking on it to bring up the language choices available and then
selecting and clicking the desired language. Note that within the same
document you can change the input language by using the Language bar.
You can produce a document with a mixture of different
languages. , which allows
users to change the input language in an application by left
clicking on it to bring up the language choices available and then
selecting and clicking the desired language. Note that within the same
document you can change the input language by using the Language bar.
You can produce a document with a mixture of different
languages.
New
users may want to take a look at the pages for writing Chinese and Japanese to get started quickly with working with Chinese and/or Japanese in their documents. There are also overviews on writing and reading Chinese
and Japanese
e-mail.
Note to users of Chinese e-mail: it is advisable to
install Microsofts Japanese language support and input editor even if
the user never uses Japanese, because, bizarre as it may seem, there are
circumstances when it is necessary to choose Japanese encoding to
decipher a message in Chinese! (See here
for a graphical illustration of this peculiar
problem.)
Please email
me your comments, suggestions, and corrections.
|